项目初衷
Android的渗透已经趋于常态化,那么漏扫也需要有一个可以去支持Android漏洞扫描的工具,此文讲解MobSF的搭建
文内包含:
1
2
3
4
5
6
7
8
9
10
11
12
13
14
15
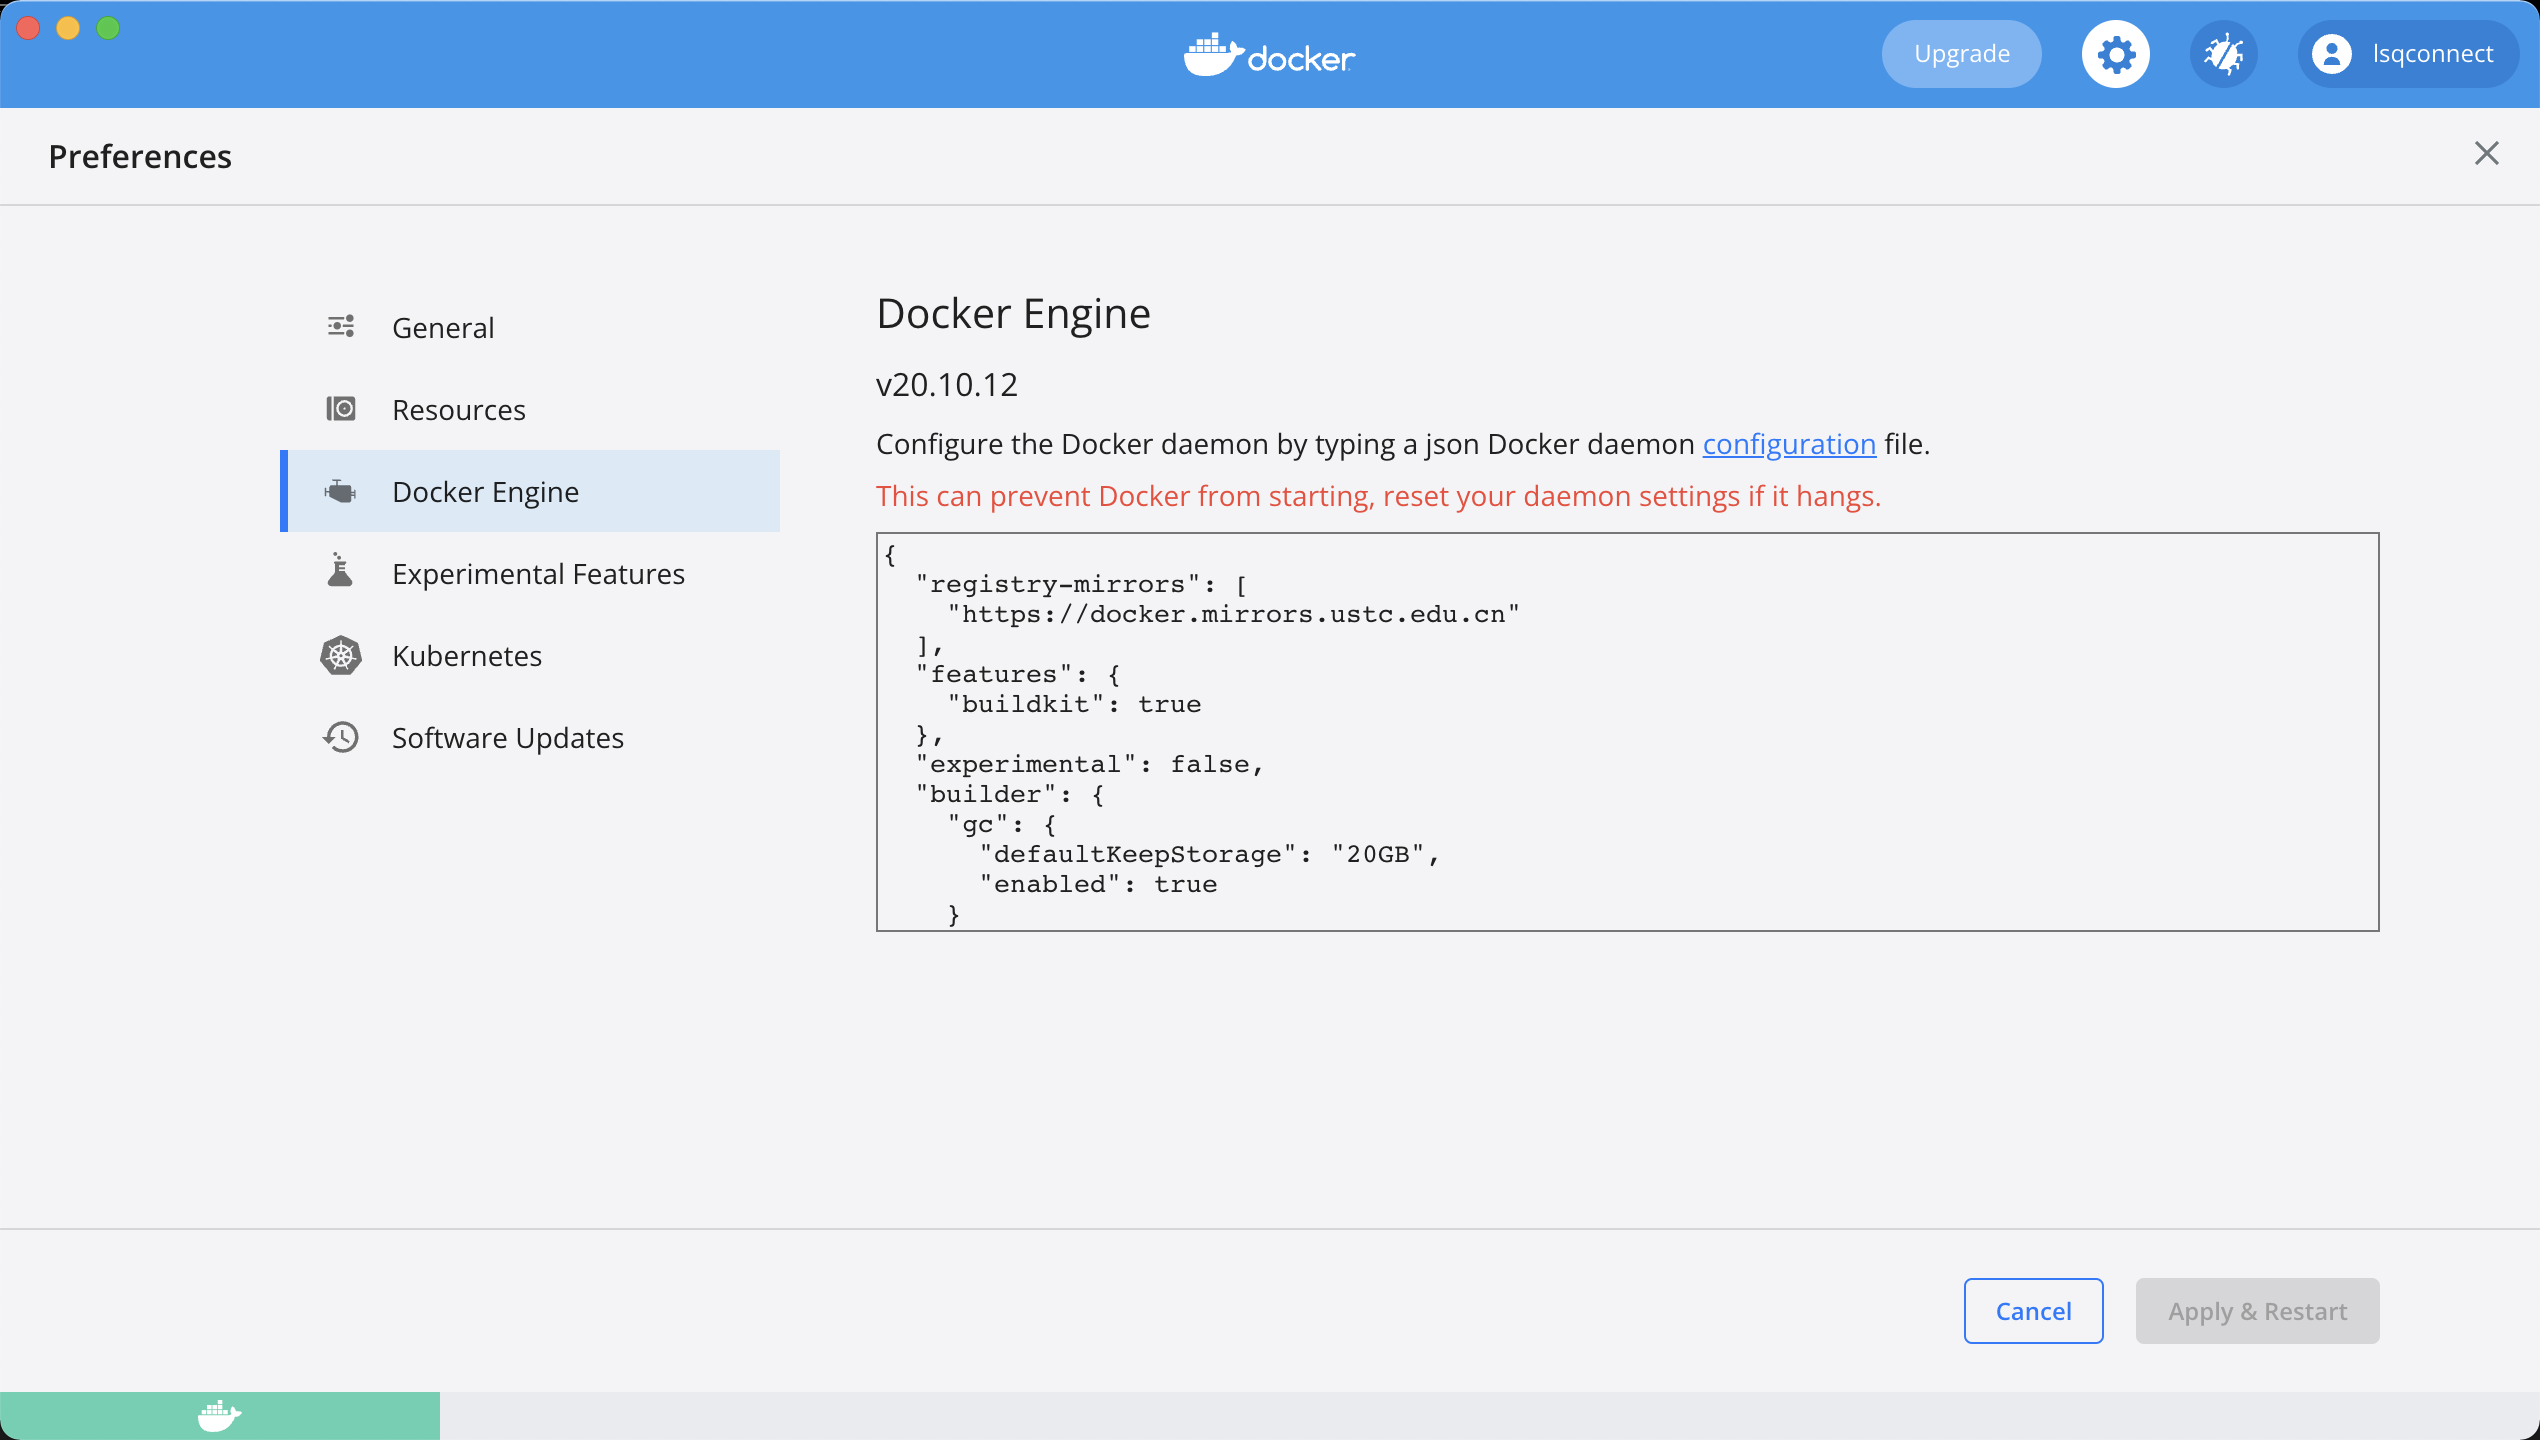
| {
"registry-mirrors": [
"https://docker.mirrors.ustc.edu.cn"
],
"features": {
"buildkit": true
},
"experimental": false,
"builder": {
"gc": {
"defaultKeepStorage": "20GB",
"enabled": true
}
}
}
|
1
2
3
4
5
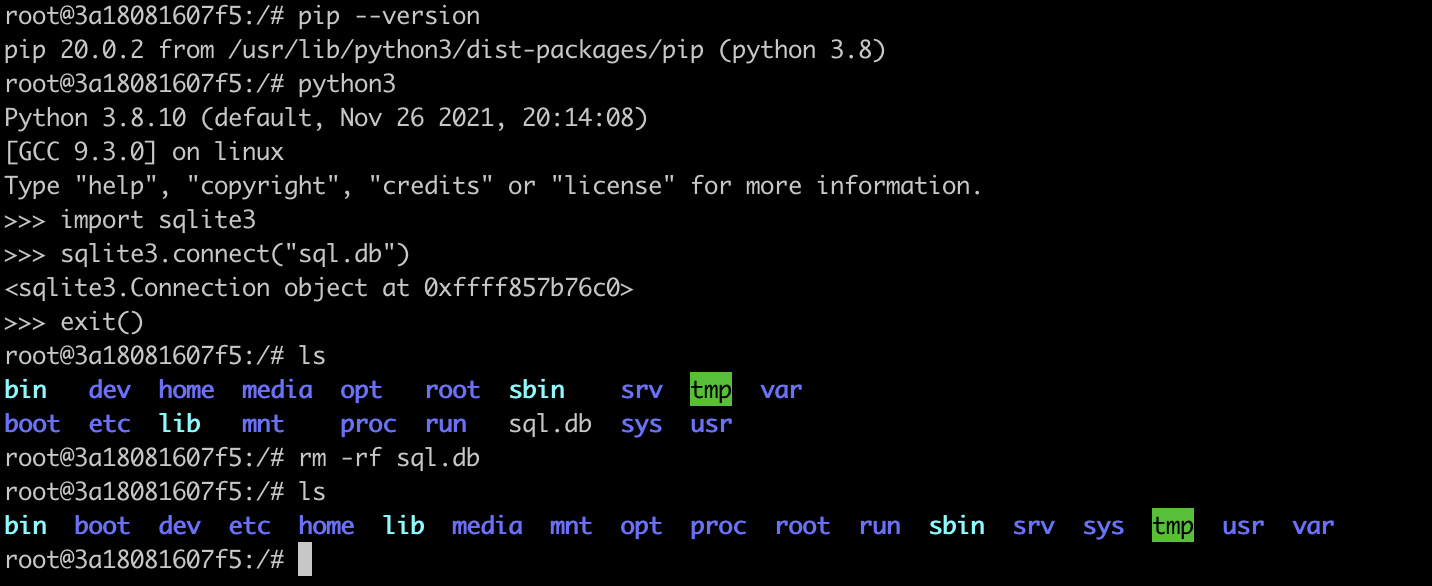
| docker pull ubuntu
docker run -itd --name MobSF -p 8081:8000 ubuntu:latest
docker exec -it 3a18081607f5 /bin/bash
|
1
2
3
4
5
6
7
8
9
10
11
| apt install vim
apt install gcc automake autoconf libtool make
apt install net-tools
apt install git
apt install python3
apt install python3-pip
|
至此,docker的初始化已经完成
MobSF
MobSF搭建
环境配置
搭建环境基本要求
1
2
3
4
5
6
7
8
9
| - 安装 Git sudo apt-get install git
- 安装 Python 3.8-3.9 sudo apt-get install python3.8
- 安装 JDK 8+ sudo apt-get install openjdk-8-jdk
- 安装基本依赖项
sudo apt install python3-dev python3-venv python3-pip build-essential libffi-dev libssl-dev libxml2-dev libxslt1-dev libjpeg8-dev zlib1g-dev wkhtmltopdf
|
正常按照配置即可,基本不会出现报错
源码安装
1
2
3
4
5
| git clone https://github.com/MobSF/Mobile-Security-Framework-MobSF.git
cd Mobile-Security-Framework-MobSF
./setup.sh
|
此处有个小提示,MobSF国内网络安装过程中会有很多的网络问题导致报错,所以此时最好修改setup.sh文件
如下图所示,该文件每次运行都会将原有的venv环境删除,最好对其进行注释,并且同步注释下一条的venv环境创建
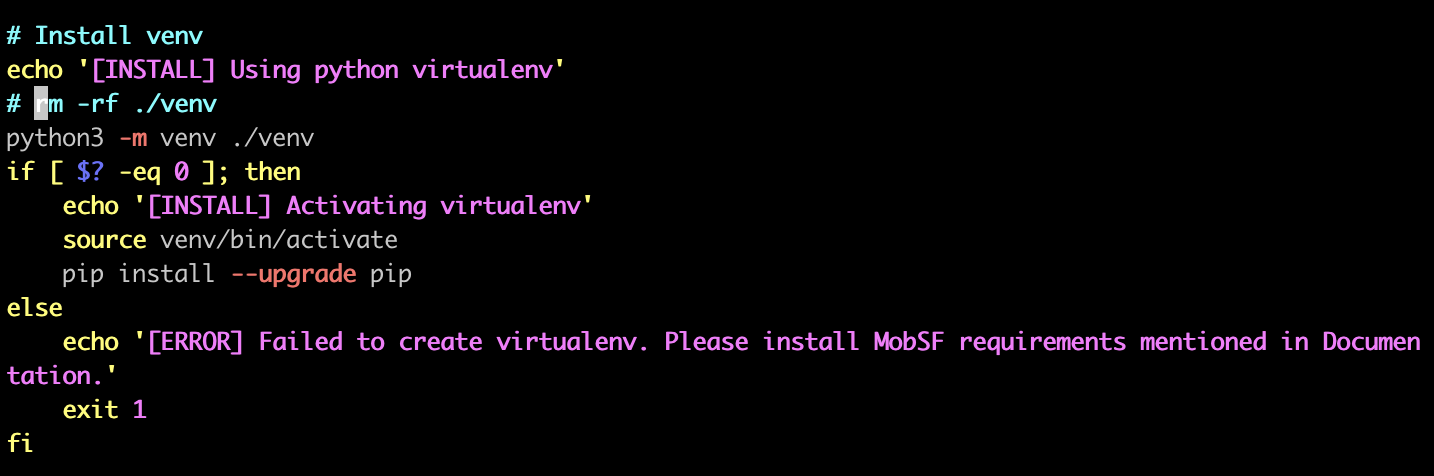
但是,注意,这个小tag只适用于之前已经执行过一次setup.sh脚本,但是报错,进而不想再继续install库的情况
安装成功后截图如下
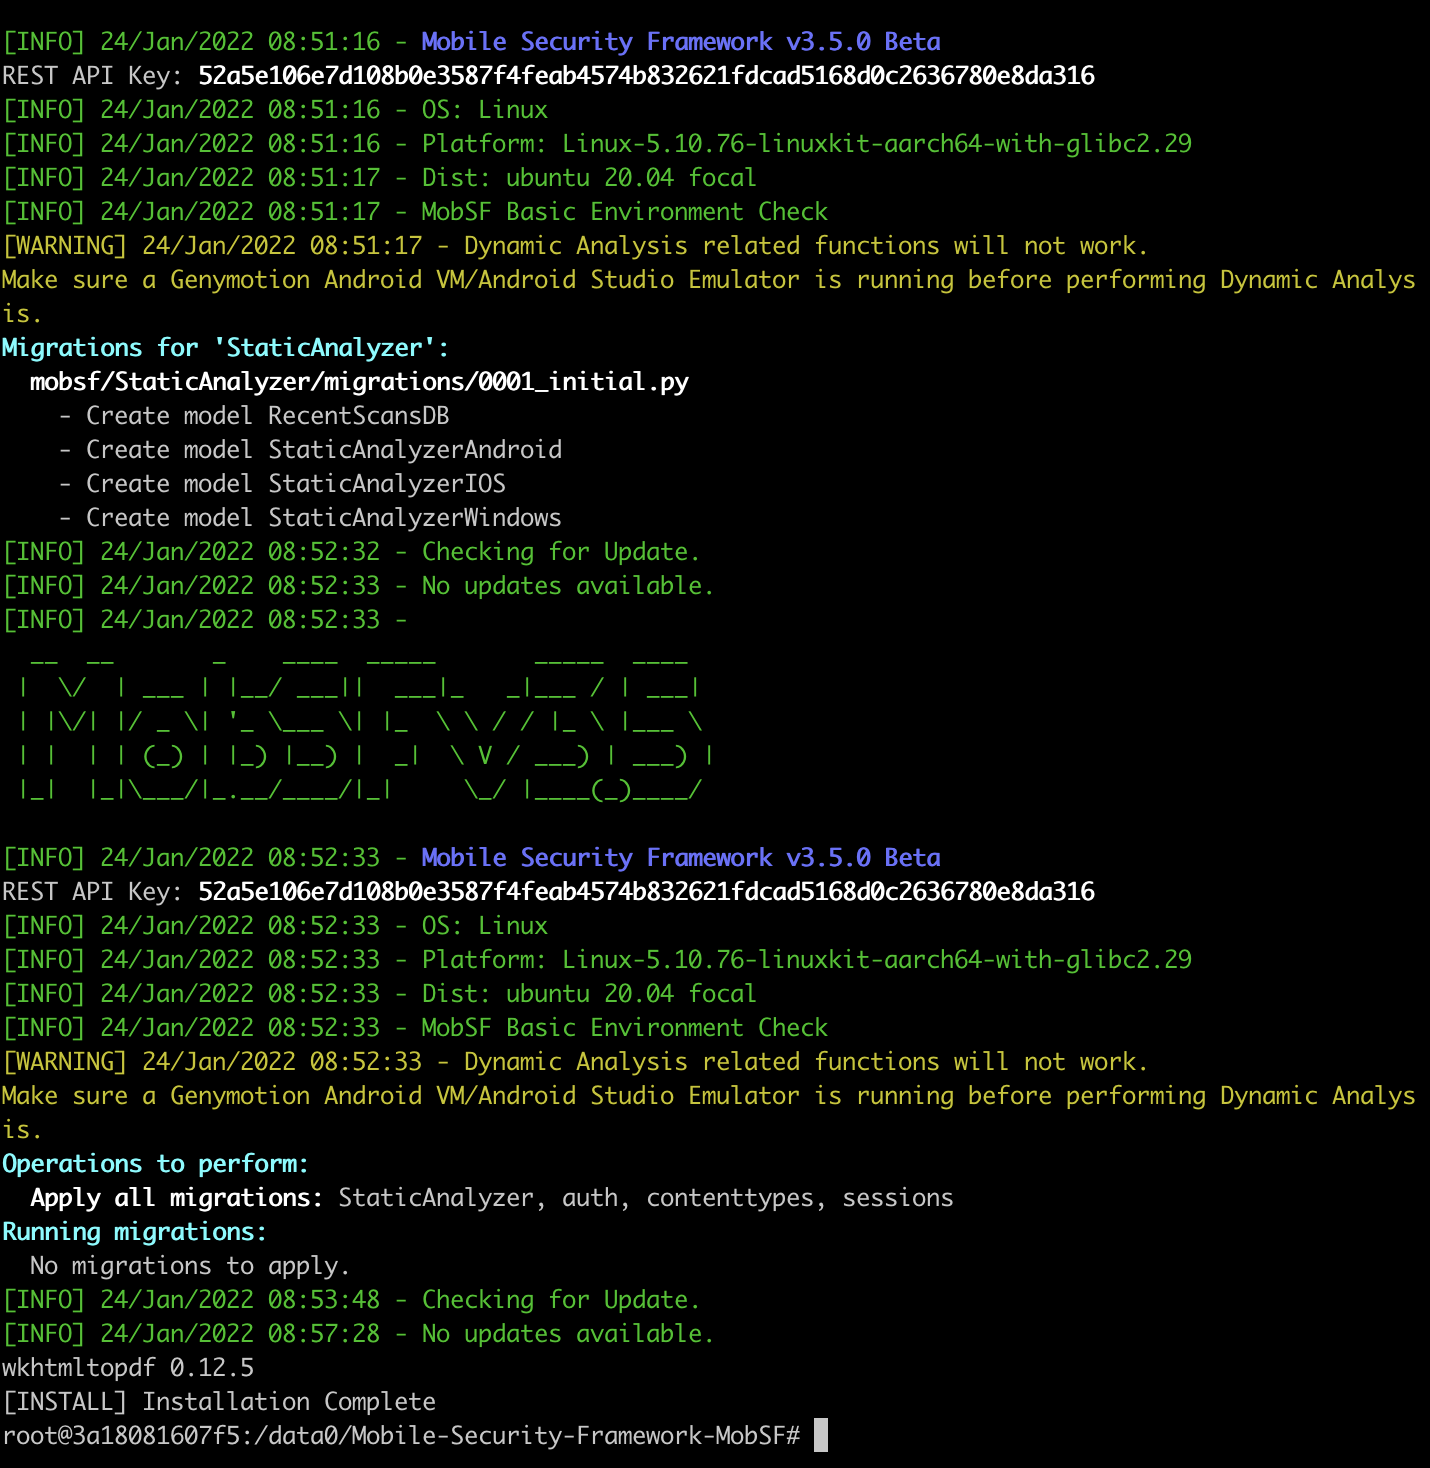
运行测试
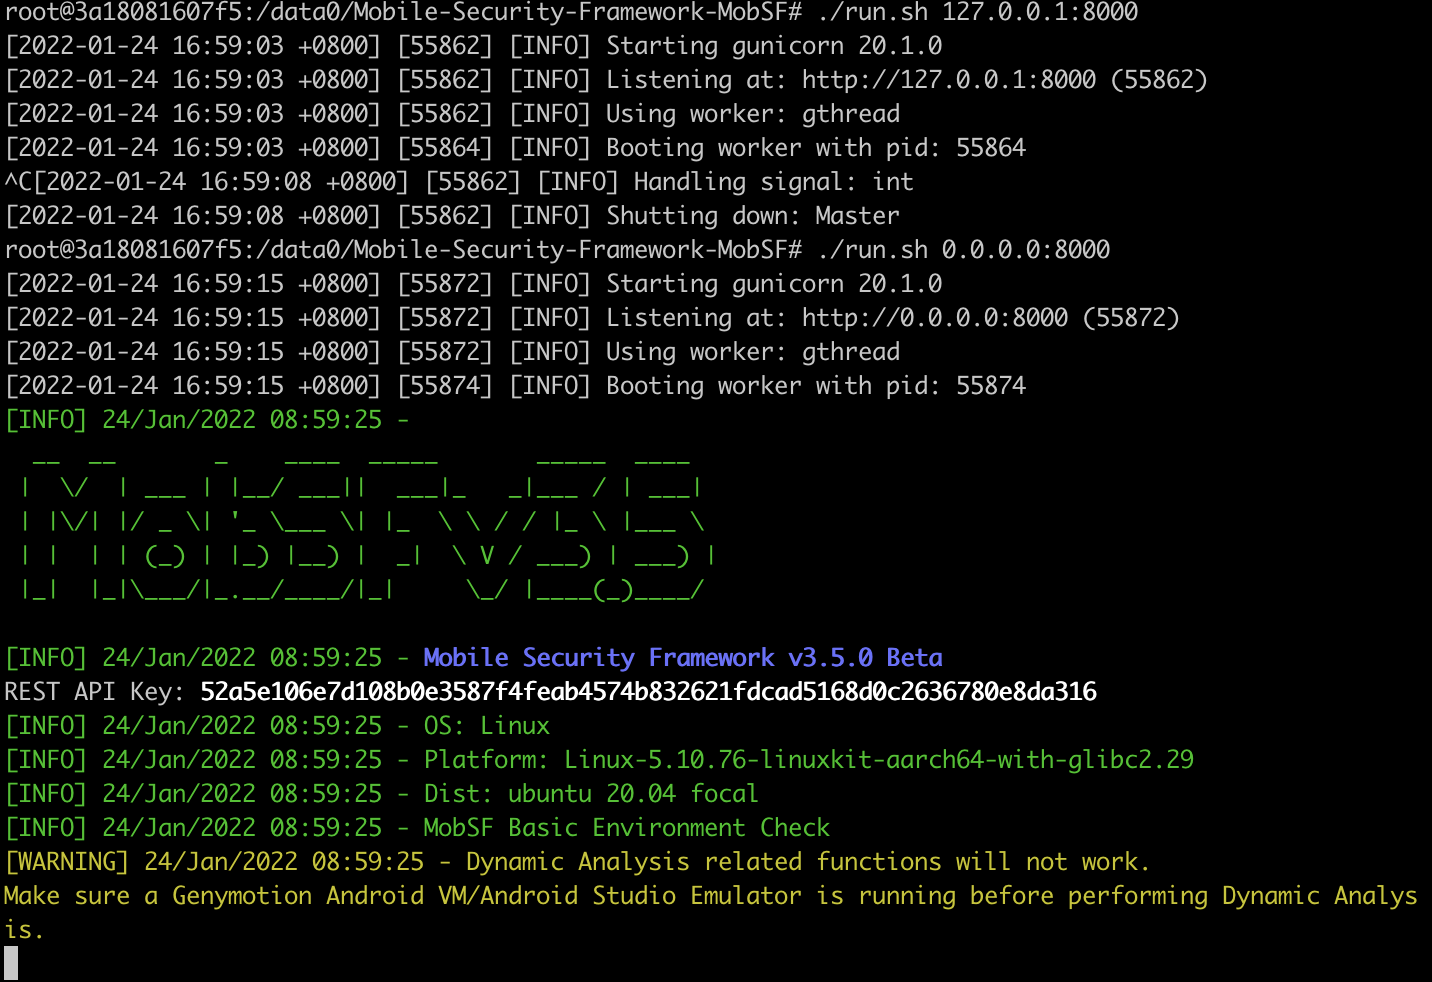
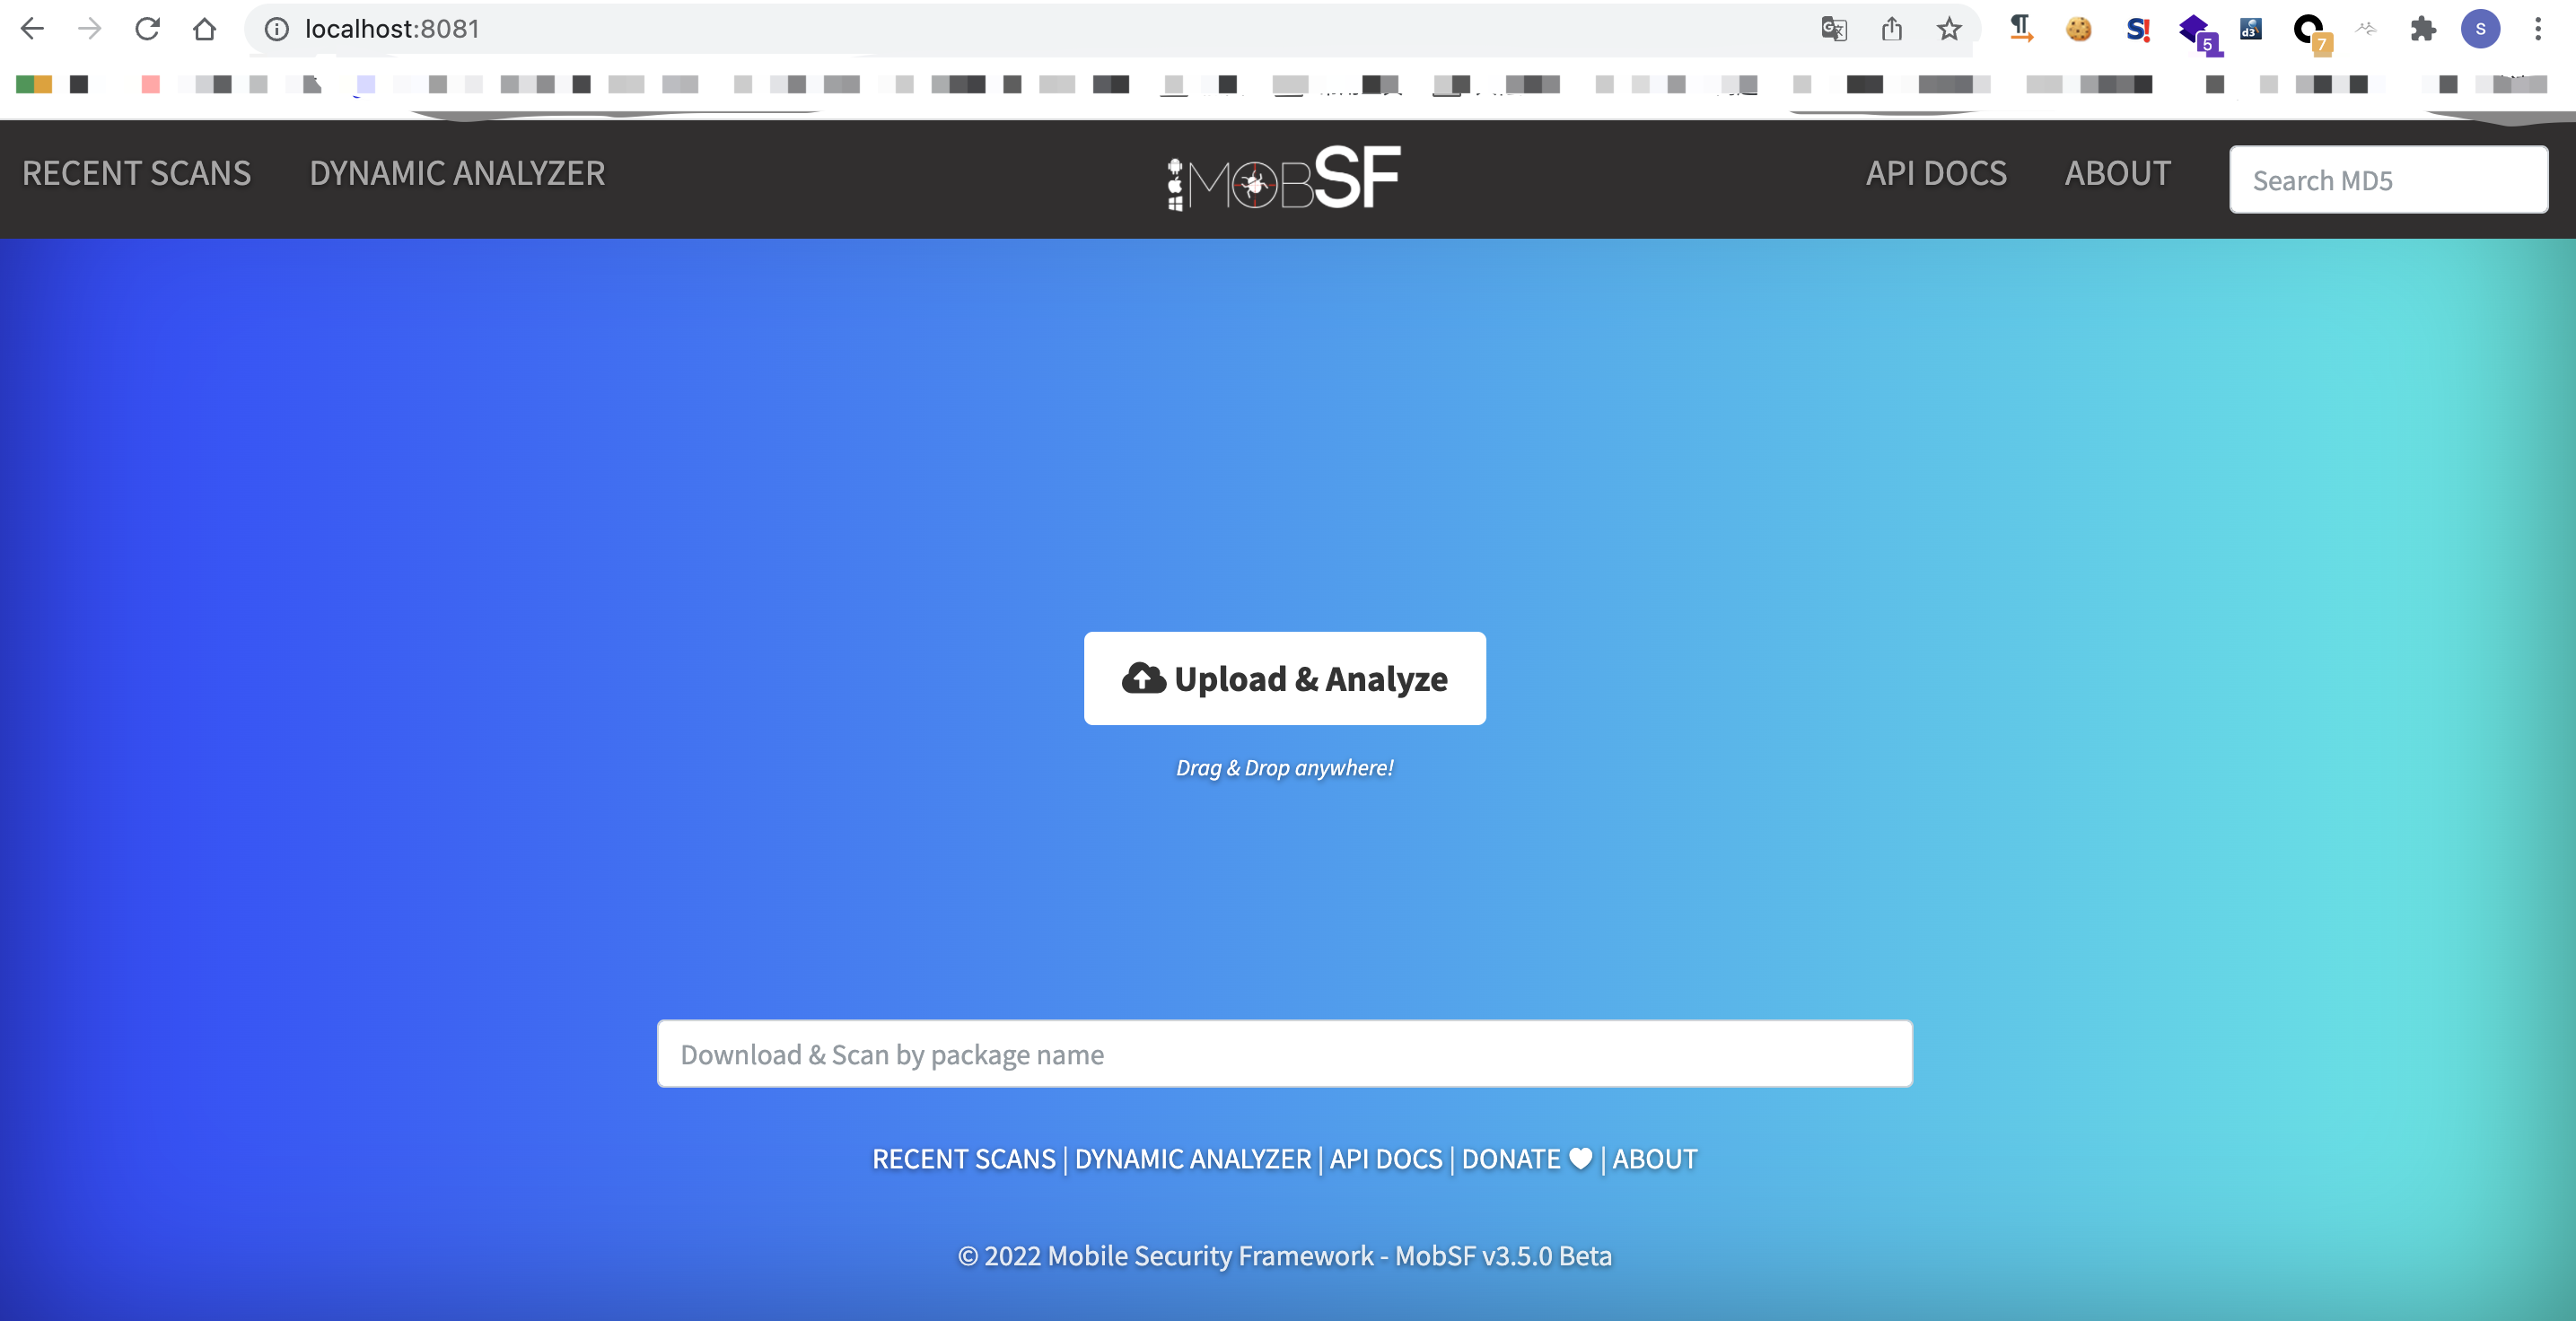
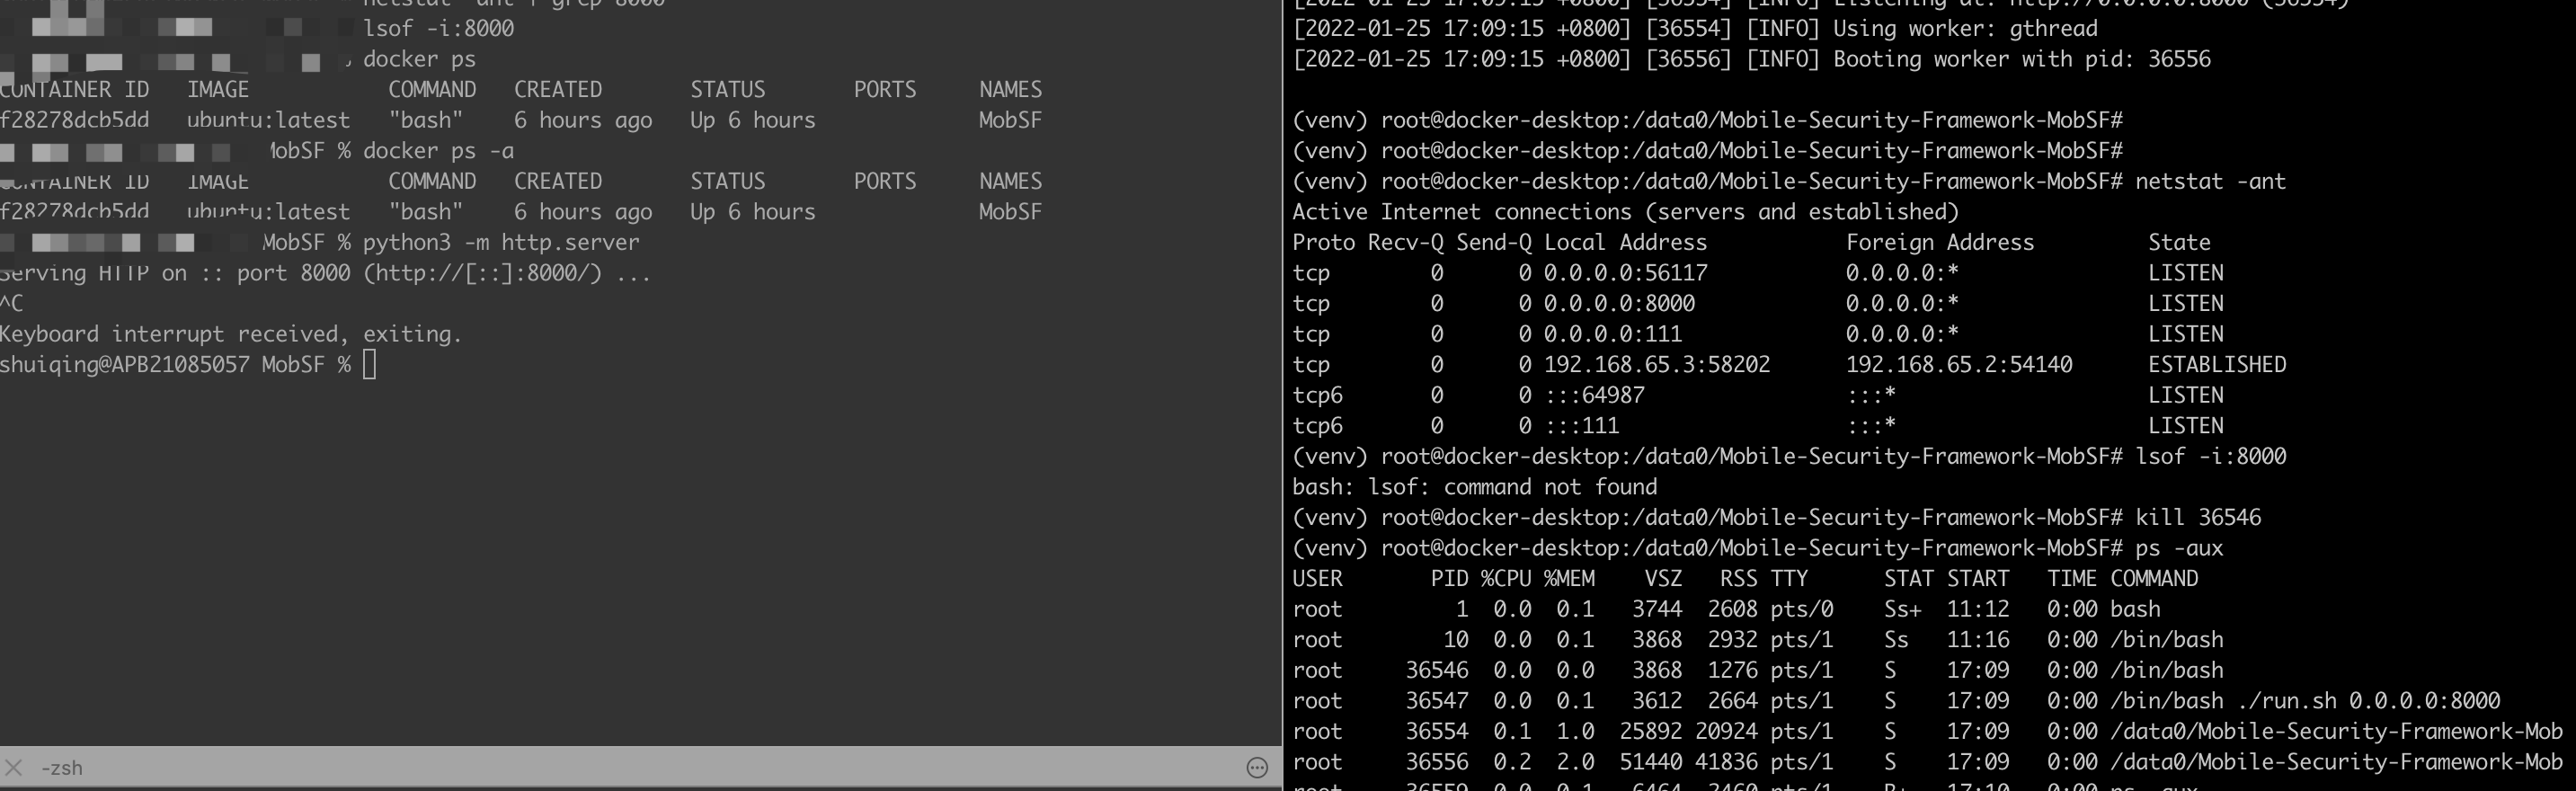
由于之前已经对docker的8000端口做了转移,所以宿主机只要访问对应端口即可
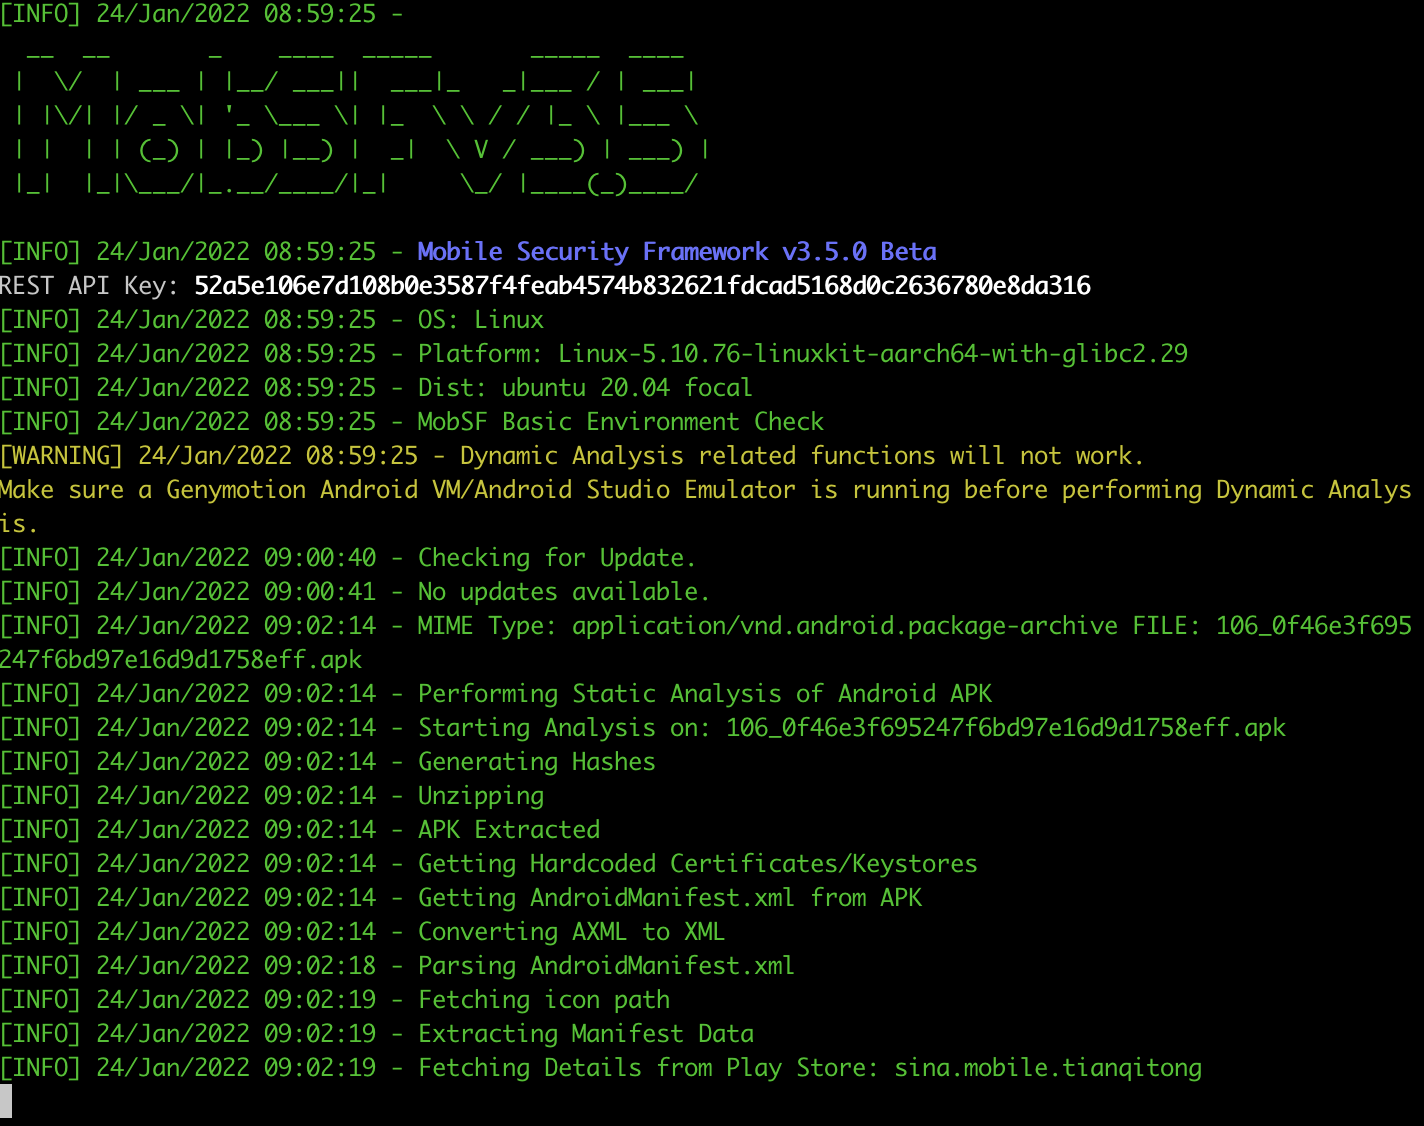
静态漏洞扫描
前端上传apk之后,就可以看到后台已经开始对apk进行分析了
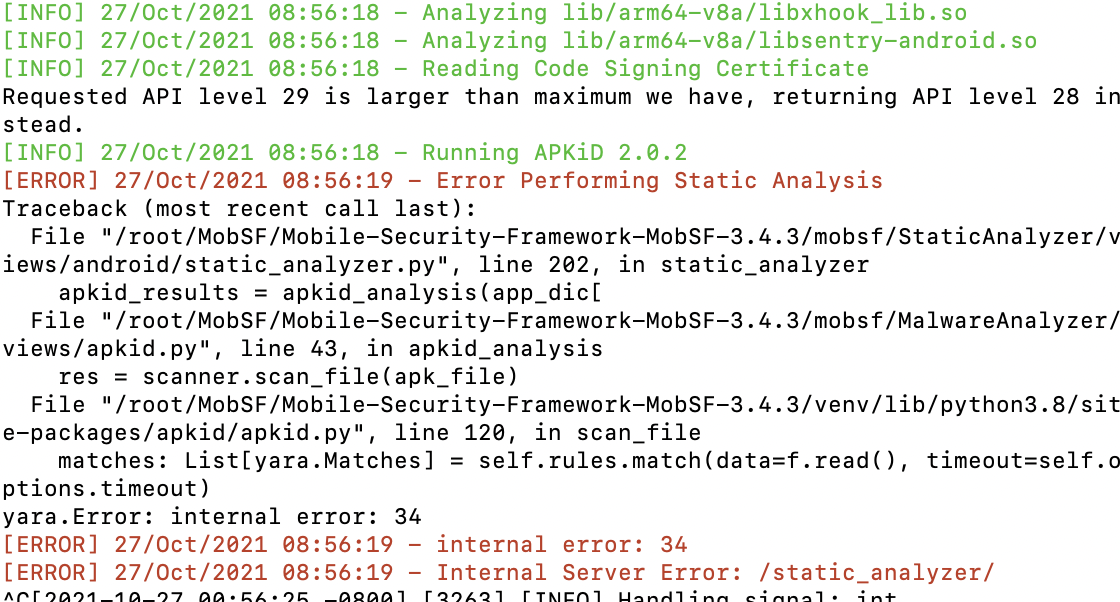
报错解决
apkid 导致的报错
报错信息如下

该情况是由于apkid的2.1.2版本导致,将版本改为2.0.1即可
timeout 问题
Python库安装完成之后,加载Django数据库出现timeout错误,报错信息如下
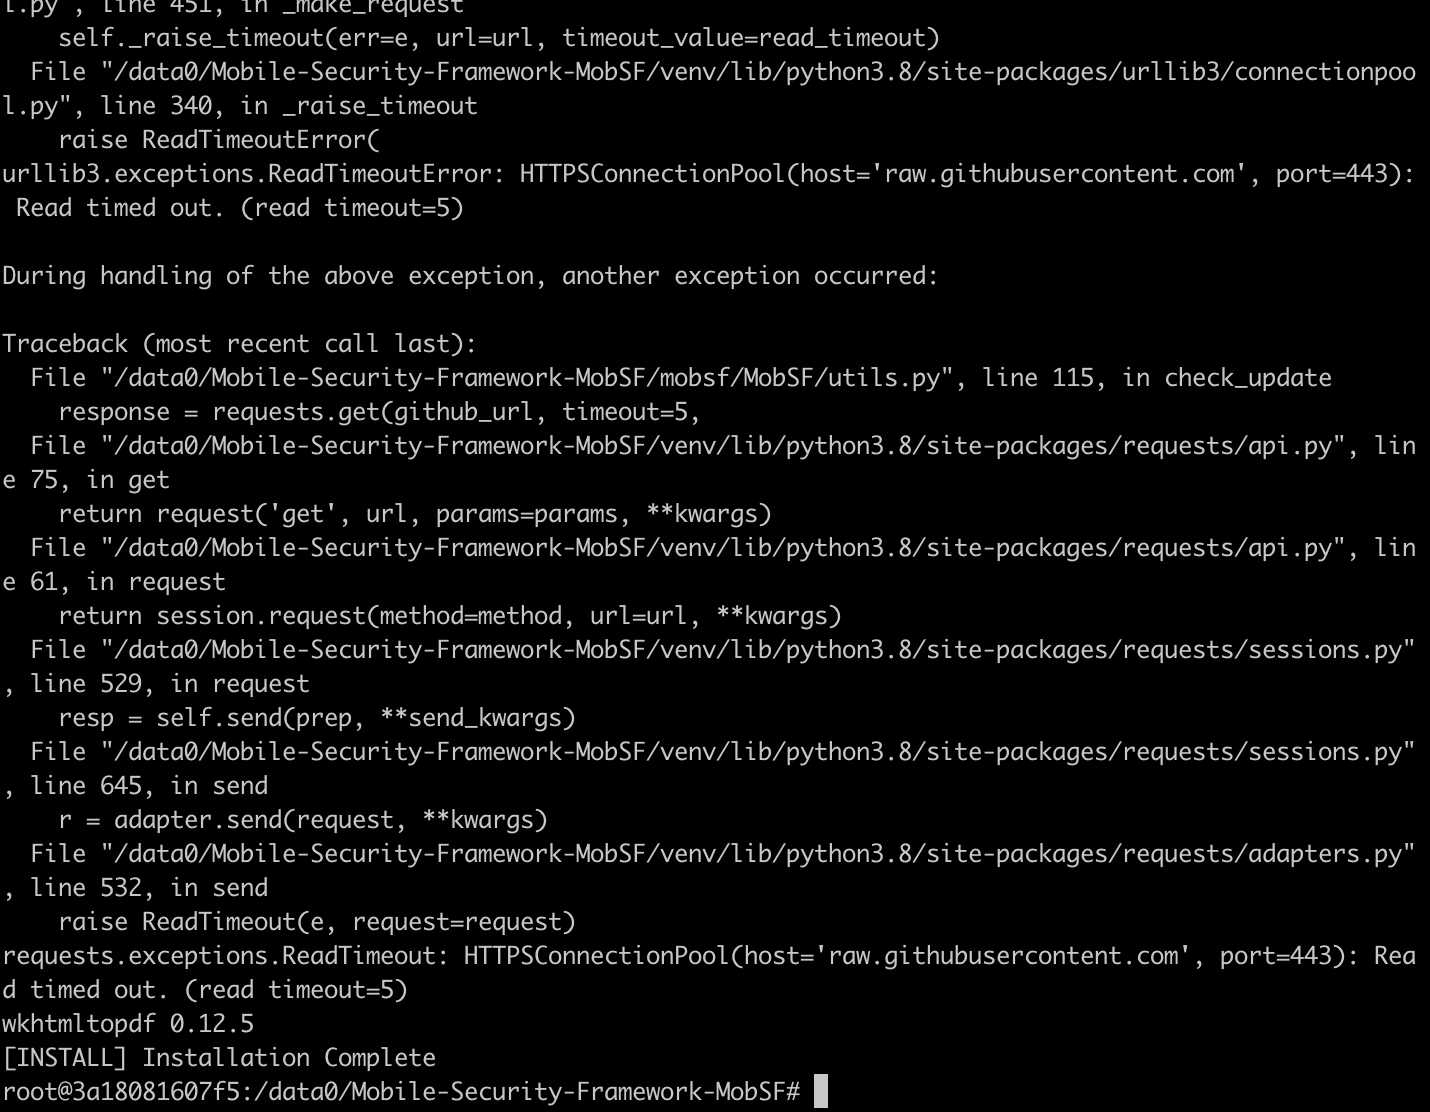
由于MobSF所有的源均属于外网信息,所以连接过程中极其容易timeout,此时只需要依据如下方法解决即可
- /etc/hosts文件添加如下内容
1
2
3
4
5
6
7
8
9
10
11
12
13
14
15
16
17
18
19
20
21
| # GitHub Start
52.74.223.119 github.com
52.74.223.119 gist.github.com
54.169.195.247 api.github.com
185.199.111.153 assets-cdn.github.com
199.232.96.133 raw.githubusercontent.com
199.232.96.133 gist.githubusercontent.com
199.232.96.133 cloud.githubusercontent.com
199.232.96.133 camo.githubusercontent.com
199.232.96.133 avatars0.githubusercontent.com
199.232.96.133 avatars1.githubusercontent.com
199.232.96.133 avatars2.githubusercontent.com
199.232.96.133 avatars3.githubusercontent.com
199.232.96.133 avatars4.githubusercontent.com
199.232.96.133 avatars5.githubusercontent.com
199.232.96.133 avatars6.githubusercontent.com
199.232.96.133 avatars7.githubusercontent.com
199.232.96.133 avatars8.githubusercontent.com
199.232.96.133 user-images.githubusercontent.com
185.199.109.154 github.githubassets.com
# GitHub End
|
- 修改timeout的时间
文件位置:mobsf/MobSF/utils.py
源文件内容
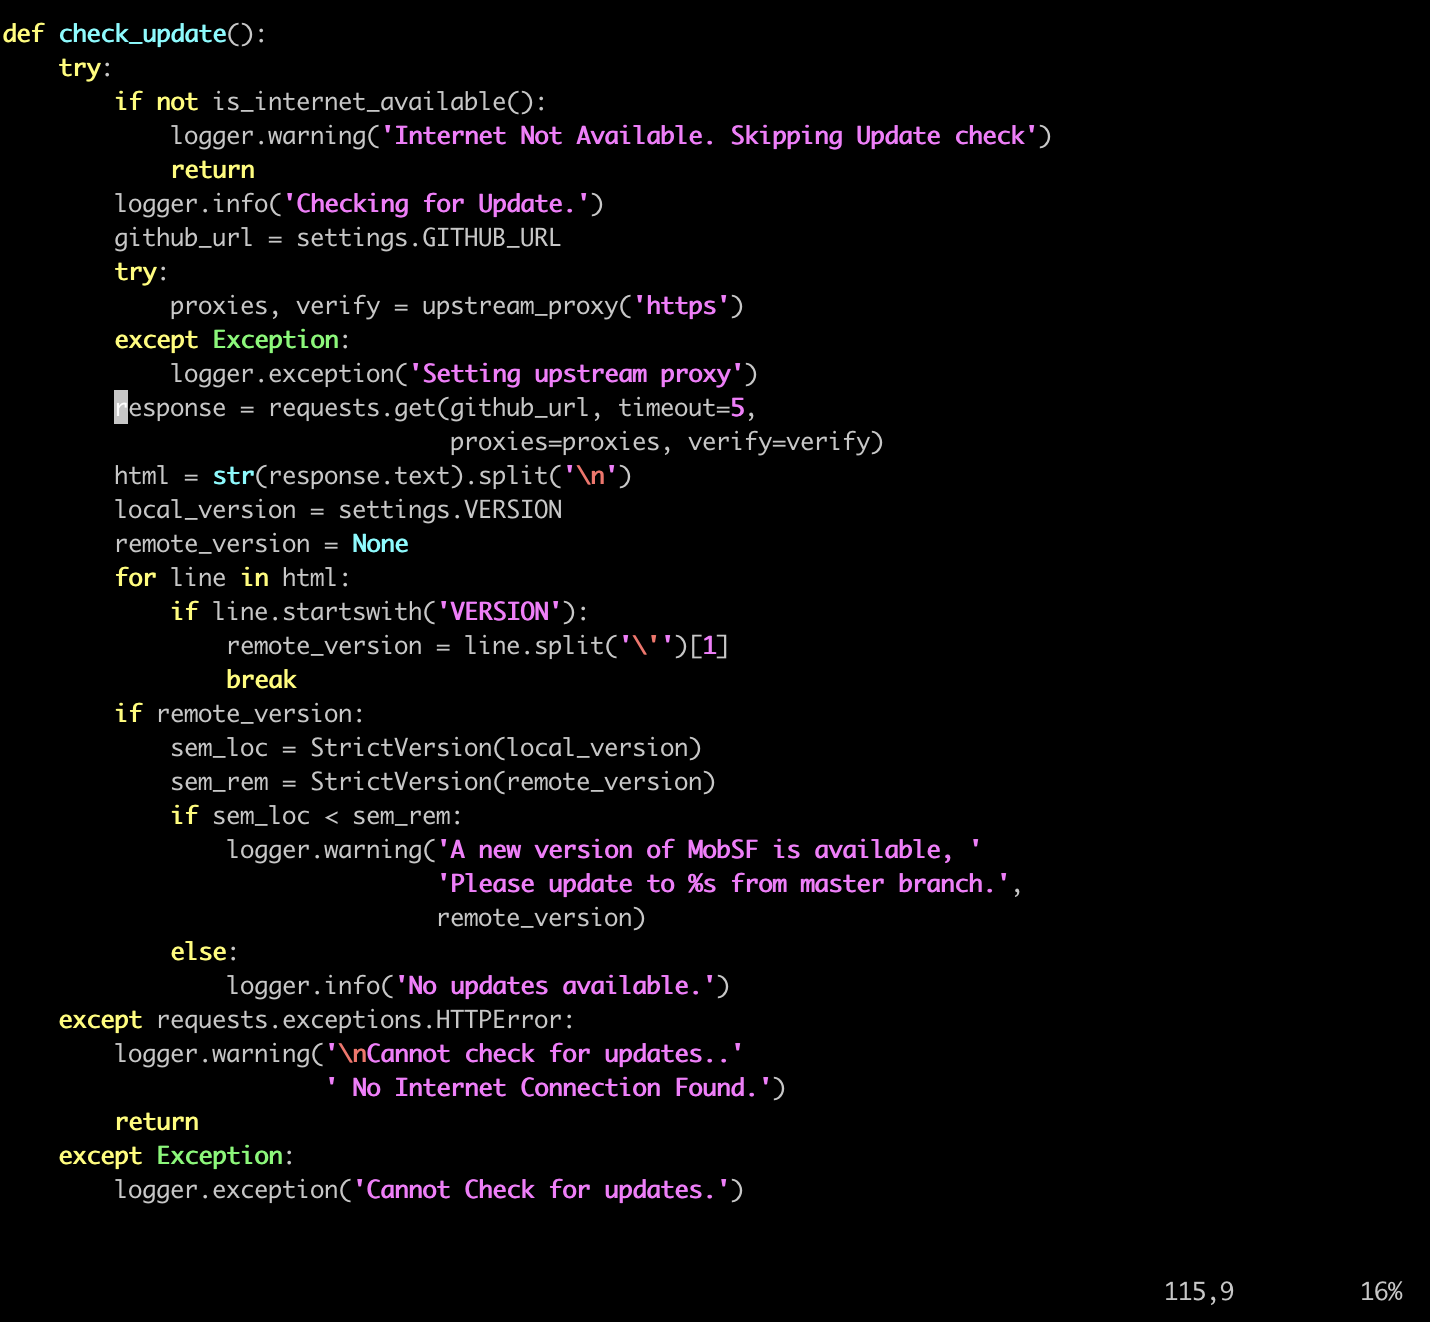
将timeout时间增加即可
1
2
| response = requests.get(github_url, timeout=300,
proxies=proxies, verify=verify)
|
include_types 错误
错误示例如下图所示
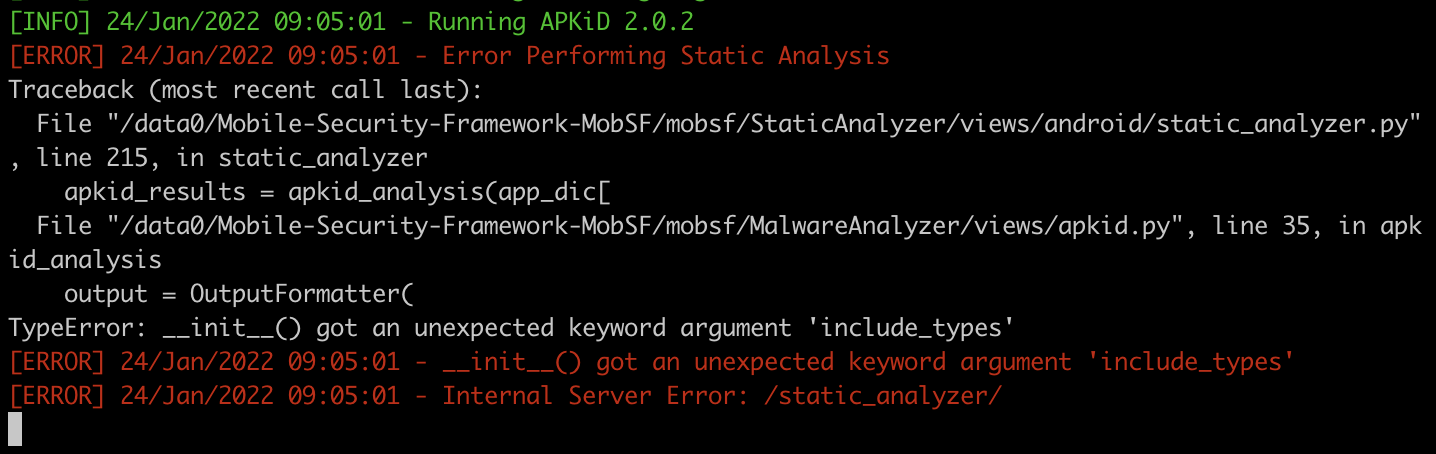
初次遇到这个问题,当时最简单粗暴的解决方案就是删除mobsf/MalwareAnalyzer/views/apkid.py”文件OutputFormatter中的include_types参数,但是删除之后,后续有遇到了新的问题
所以这个问题的核心不是include_types,而是yara库的问题
1
2
3
4
5
6
7
8
9
10
11
12
13
| source venv/bin/activate
pip uninstall yara-python
pip uninstall apkid
pip install --upgrade wheel # 如果没有,安装即可
pip wheel --wheel-dir=/tmp/yara-python --build-option="build" --build-option="--enable-dex" git+https://github.com/VirusTotal/yara-python.git@v3.11.0
pip install --no-index --find-links=/tmp/yara-python yara-python
pip install apkid
|

github 无法连接问题
docker默认使用的网络连接方式,网络性能极差,所以使用过程中,很难连接到github环境
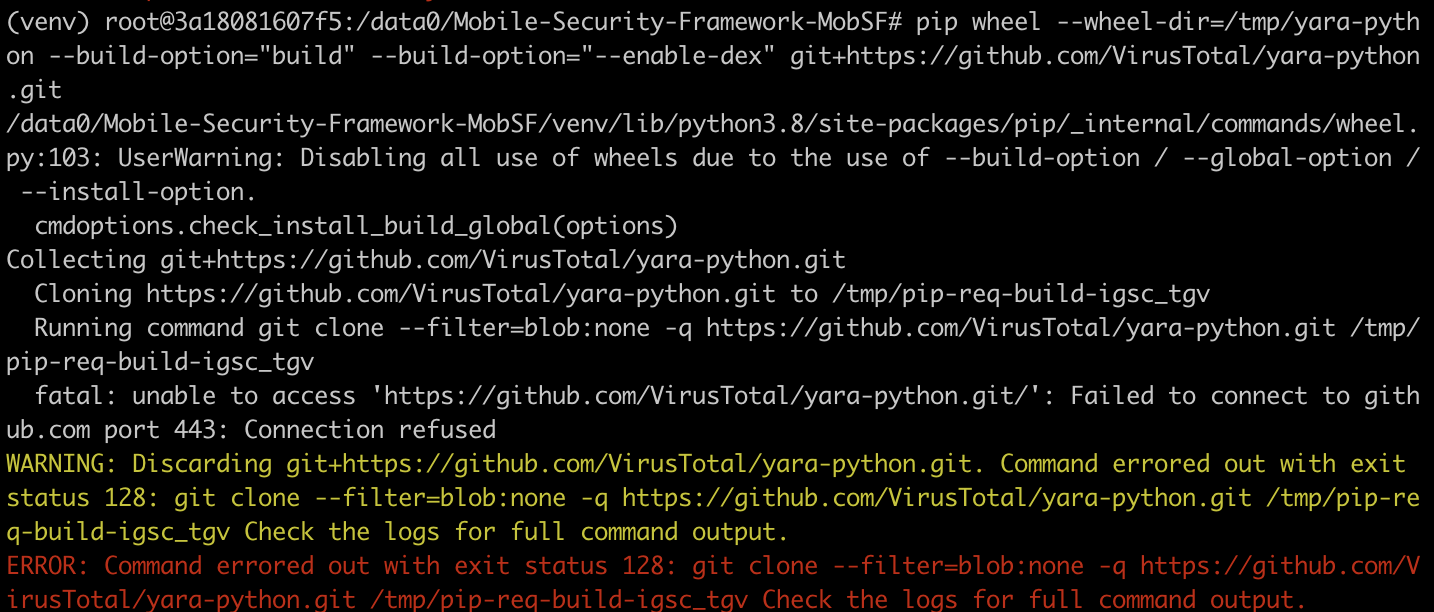
解决问题也很简单,使用--net=host映射主机网络即可,但是这种方案是和宿主机共享网络,也就是在网络这块不会与宿主机隔离,而是共享宿主机的网络配置;所以,导致docker无法使用-p来指定端口映射
1
| docker run -itd --net=host --name MobSF ubuntu:latest
|
并且,mac也存在一个致命问题docker容器无法使用–net host模式共享宿主机端口
这种情况的根本原因在于mac对于docker的限制
因为MacOS无法访问Docker桥接网络,而恰恰Docker默认是使用bridge模式,所以导致Docker无法联网,并且无法与宿主机沟通。
Host主机网络驱动程序仅适用于Linux主机,并且不支持Docker for Mac,Docker for Windows或Docker EE for Windows Server。
因此无论docker怎么开启端口,Mac均不会受到影响
所以,切记,不要在Mac中使用host模式,血与泪的教训
参考文档
docker官方文档